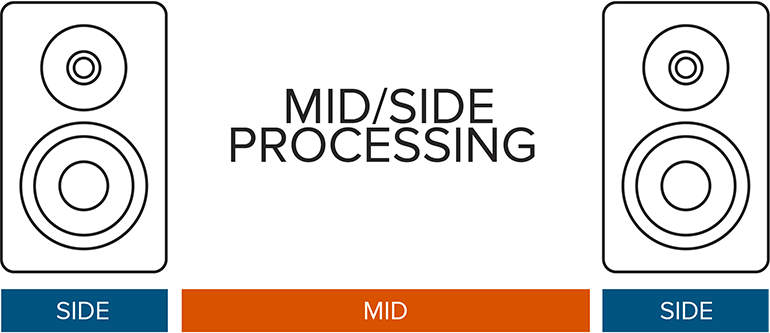
Today I want to share with you a mid / side processing tutorial. Something that I don’t see a lot of people talk about. I’ll also share some creative ways you can use to get the most out of this processing technique.
Some people think that mid side processing is only necessary in the mastering stage but it can really come handy in the audio mixing process as well. This technique can be used in a lot of different ways but 1st let’s understand what it is.
What is Mid Side Processing?
Tools that control dynamics and tone such as reverb, equalizer, compressors and modulation effects will affect either the whole mono or stereo signal of a sound. However audio tools that have mid side processing functionality can be able to affect the Mid Channel as well as the Side Channels separately.
The mid channel is the center of the stereo image and the side channel is the width of the stereo image. With mid side processing you can achieve a full and wide sounding mix. The same technique can also be achieved by using other stereo imaging techniques or even panning.
The whole concept of Mid/Side Processing was used back in the 1930s before stereo playback existed as a recording technique to enhance space. But today, this technique is used in a lot of different ways and for many reasons.
Mid/Side processing when done wrong can cause phase shift issues or even stereo image imbalance. So use it but remember that less is more.
Using Mid/Side Processing During Mixing
The most common use of mid side processing during mixing is to keep low-end sounds such as kick and bass in the center of the stereo field. This is to make sure they’re in mono and you can achieve that by using mid/side equalization.
You can do that by simply cutting the low-end on the “sides” (stereo channel) of the sound. Don’t cut it out completely, you can push it at least up to 300Hz and leave some of the top end.
Another neat trick is to use this processing technique in your send or return signals. For instance – in your reverb send channel, insert an eq plugin that has mid/side feature then scoop out the low-mids on the Mid Channel and leave the Sides untapped.
That will prevent the reverb from adding any mud on the Mid Channel of any sound that you affect with that reverb. You can also do a low-cut if you want to. Boosting the high frequencies on the sides will increase clarity of the reverb making the sound that is affected brighter. The possibilities are endless, just be creative.
Some call this technique Mid Side Reverb. But you can do the same thing for any effect such as delay or even modulation effects as well. If you have a stack of guitars then route them to a group or bus channel. Then make a high frequency boost on the Sides, that will make them wide helping them sit well in a mix.
You can automate this by increasing the volume of the Sides only in the chorus parts of the song so that the guitar sounds bigger and wider in the chorus as compared to the verse. The same technique can be used on vocals and many other instruments.
If you want to enhance the room sound of your drum overheads then make a small high frequency boost on the sides, but don’t overdo it keep it subtle. A boost in the Mid Channel of your drum bus/group will enhance the toms, kick and snare.
A lot of plugins have the M/S feature, it’s not only limited to equalizers but you can also find it on compressors and even distortion plugins.
Mid side compression is a really neat trick to achieve more loudness by compressing the Mid channel and increasing the Sides. Pretty simple but really effective. You can even be more creative and do parallel compression with M/S technique.
Another neat trick is to add mid side compression on a reverb send or return channel, by compressing the mid channel more than the sides. But note that by increasing the sides you’re making the reverb wider.
My favorite 2 plugins for doing mid side processing are the Waves Center and Fabfilter Pro-Q. For M/S compression I use the Waves Puigchild. But there’s a lot of great tools out there so it doesn’t matter if you’re using ableton, pro tools, logic or whatever.
As you can see above, the possibilities are just endless. Hope this blog post does help you get some ideas on how you’re going to use mid side processing in your audio mixes. If you have any question then feel free to leave a comment below.